Guides
How to remove a kitchen faucet
Taking the old faucet out is the hard half of a faucet swap. Everything that goes wrong on this job goes wrong in the first forty minutes.
Disclosure: we earn a commission if you buy through the Amazon links on this page, at no extra cost to you. Commission never decides a verdict or a ranking position — read our editorial policy and affiliate disclosure.
How we assessed these: this is a procedure, not a timing or a cost. No manufacturer publishes how long a faucet removal takes and we will not estimate one. Product specifications are linked to the maker's own page at every figure.
Short answer
Shut both valves, open the faucet to drain the lines, disconnect the supply lines at the valves, disconnect the sprayer hose and any sensor wiring, then undo the mounting nuts behind the sink with a basin wrench and lift the faucet out. The mounting nuts are the whole job: spray them with penetrating oil before you start anything else, and give it twenty minutes to work.
Removal is where faucet swaps go wrong, and it is almost always the same three things: a shut-off valve that will not close, a mounting nut that has fused to its shank, and a cabinet so full you cannot see what you are doing. All three are visible before you begin, which means all three can be dealt with before the water goes off.
Before you touch anything
- Empty the cabinet completely. Everything out, including the shelf if it lifts. You need to lie on your back and look up.
- Spray penetrating oil on the mounting nuts. First action, so it has the longest possible time to creep into the threads while you do everything else.
- Test the shut-off valves. Close and open each one. If either will not close, or weeps from the stem afterwards, stop — you are replacing valves, which is a different job on the house's pipework.
- Put a towel and a bucket in the cabinet. There is water in the lines after the valves are shut, and it comes out at the worst angle.
The valve test is the one people skip and the one that most often turns a swap into a trade call. Do you need a plumber to install a kitchen faucet lists the five conditions that change the answer, and a failed shut-off valve is the first of them.
The eight steps
Shut both supply valves and open the faucet
Close the hot and cold angle stops under the sink. Open the faucet fully, both temperatures, and leave it open. That drains the lines and relieves pressure so nothing sprays when you break a connection.
Disconnect the supply lines at the valves
Hold the valve body still with one wrench and undo the supply nut with another, so you do not twist the valve on its stub. Have the towel under it. Expect a cupful of water from each line.
Disconnect the sprayer hose and the weight
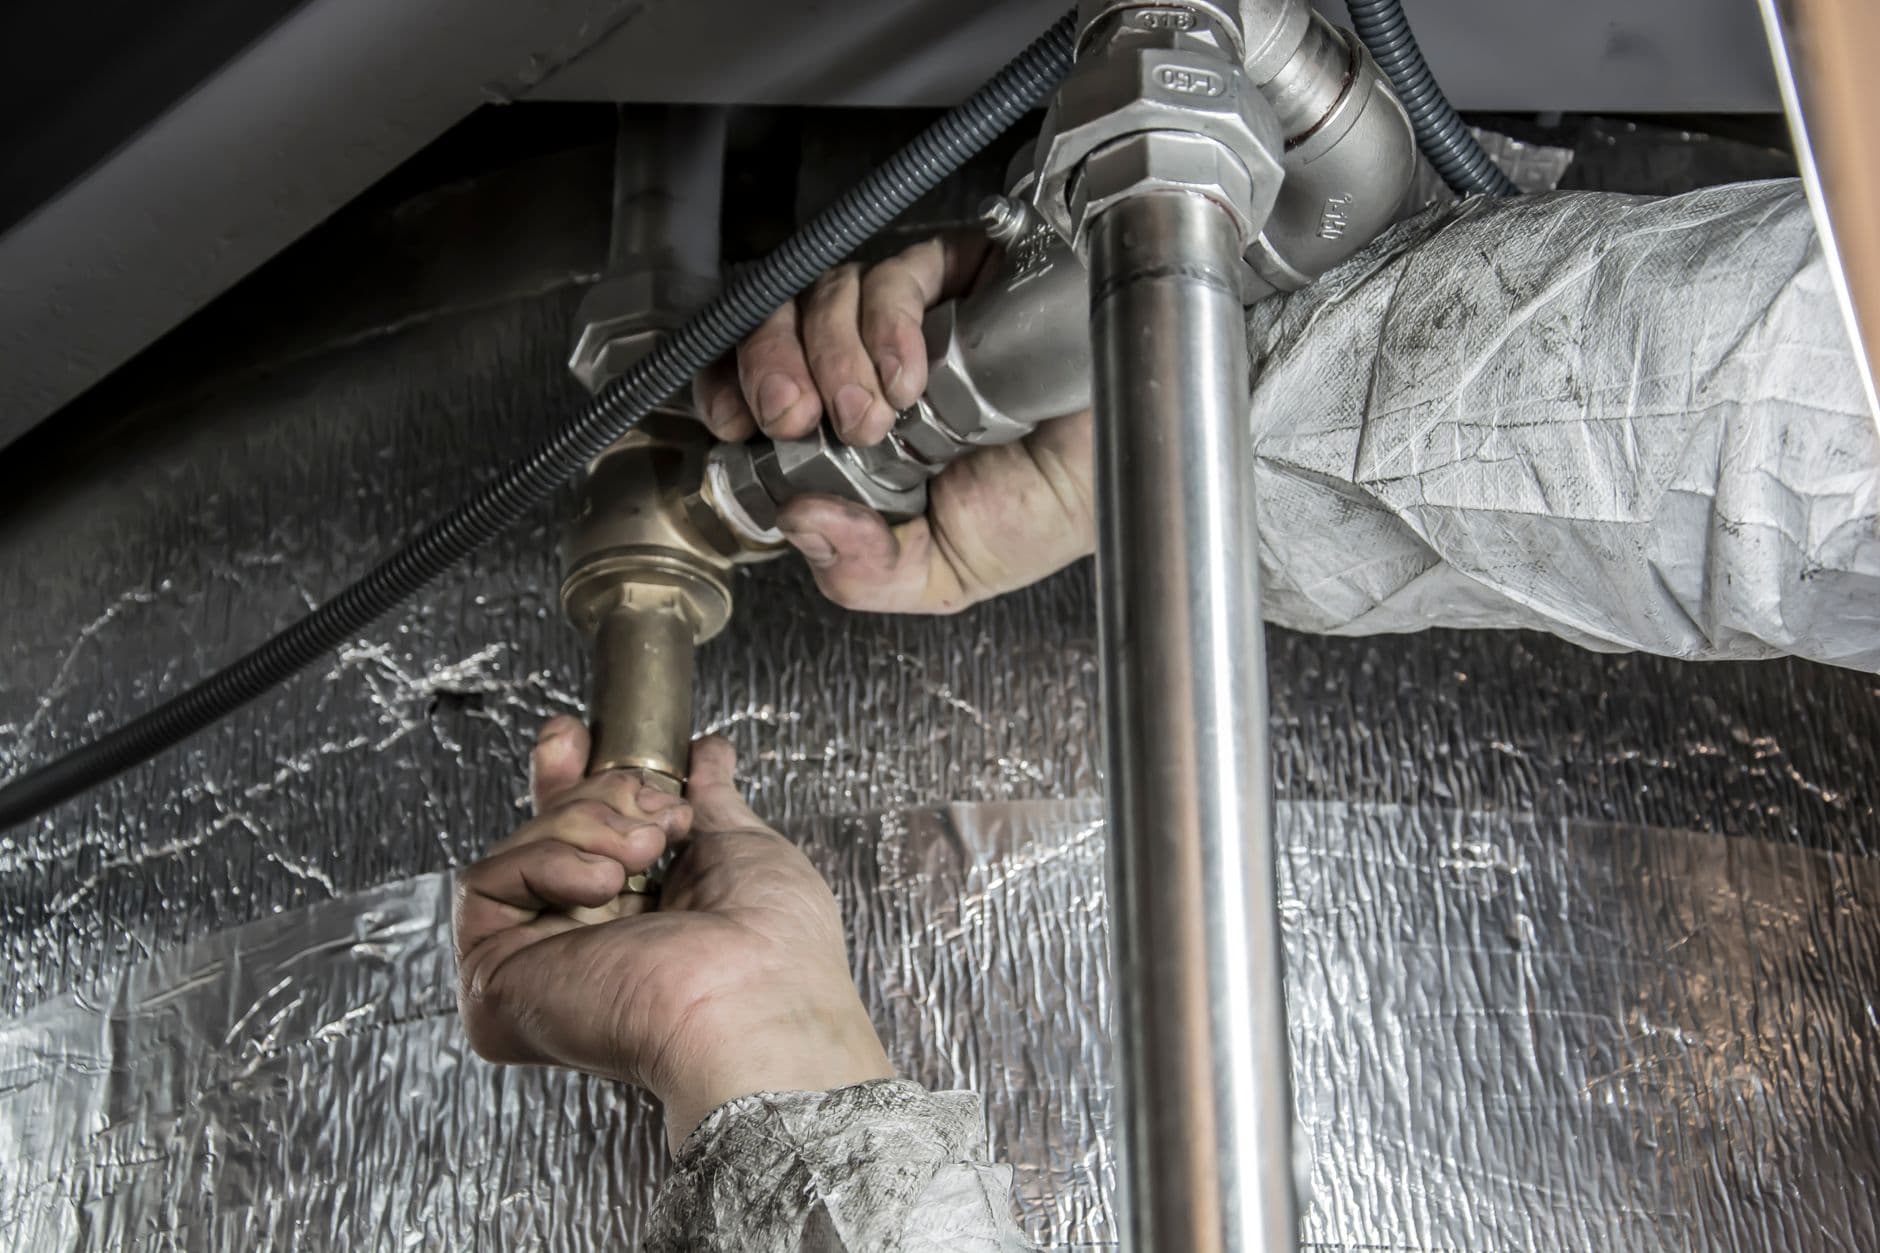
On a pull-down or pull-out, unclip the counterweight from the hose and disconnect the hose at the valve body — a push-fit collar on quick-connect systems, a threaded coupling otherwise. Feed the wand back through the spout from above if the hose will not pass the body.
Disconnect any electrics
A touch or touchless faucet has a control box, a solenoid and either a battery pack or a mains lead. Unplug the connectors at the box and note which went where. If it is mains powered, unplug it at the outlet before anything else.
Free the mounting nuts
Get the basin wrench onto the first nut, with the head angled so the jaw closes as you turn counter-clockwise. If it moves, keep going. If it does not, spray again and leave it. Force at this stage is what rounds a nut.
Remove the deck plate hardware
If there is an escutcheon or deck plate, its own fixings come off after the main nuts or with them, depending on the design. Support the faucet from above so it does not drop into the bowl as the last nut frees.
Lift the faucet out
Straight up, slowly, watching the hose and any wiring follow. Something is usually still attached on the first attempt.
Clean the deck
Scrape off the old putty or silicone with a plastic scraper and a utility knife, then clean the area with warm soapy water and dry it. The new faucet's gasket needs a flat, clean, dry surface, and this is the step that decides whether the new one weeps at the base.

Photograph shows the product category, not this specific unit. We do not republish manufacturer product photography.
1. The tool this job needs
RIDGID Model 1017 telescoping basin wrench
RIDGID · Best for any faucet removal or install
The one tool that decides whether a faucet swap is a two-hour job or a six-hour one. Faucet mounting nuts sit behind the sink where no normal wrench reaches; a basin wrench's spring-loaded head ratchets one-handed in that space. The telescoping shank is what gets you from a shallow vanity to a deep kitchen cabinet.
Published specifications
What works
- The 10-to-17-inch telescoping shank covers both a shallow bathroom vanity and a deep kitchen base cabinet
- One-handed ratcheting matters, because the other hand is holding a flashlight
- Alloy steel jaws grip a plastic mounting nut without crushing it
- The head locks at an angle, which is how you reach a nut behind a disposal
What does not
- A single-purpose tool that lives in a drawer between faucet jobs
- A badly corroded nut still needs penetrating oil and patience, not a better wrench
- No substitute for clearing the cabinet out before you start
Skip it if
Skip it if a plumber is fitting the faucet — they own one, and you would use yours perhaps twice a decade.
#ad Affiliate link · We publish no price; Amazon shows the current one
Raw specifications: RIDGID’s own page for the RIDGID Model 1017 telescoping basin wrench.

Photograph shows the product category, not this specific unit. We do not republish manufacturer product photography.
2. Easiest replacement to fit
Delta Leland 9178-AR-DST
Delta · Best for most kitchens, one or three holes
The pull-down we would fit in most kitchens, because the two parts that usually fail first on a pull-down are the two Delta engineered around: the docking mechanism and the valve. MagnaTite pulls the wand back into the spout with a magnet instead of relying on a friction collar, and Diamond Seal keeps water off the valve. It ships with a deck plate, so it covers a three-hole sink or mounts through one.
Published specifications
- Flow rate
- 1.8 gpm source
- Spout height
- 7-7/8" deck to outlet source
- Spout reach
- 9-3/16" source
- Overall height
- 14-7/8" source
- Mounting
- Single hole; deck plate included for three-hole sinks source
- Supply lines
- Integrated InnoFlex PEX, pre-attached at the valve source
- Connection
- 3/8" compression source
- Warranty
- Delta limited lifetime source
- Lead compliance
- Meets NSF/ANSI 61 source
What works
- MagnaTite docking is a magnet, not a friction fit — a wand that stops seating is the most common pull-down complaint, and a magnet does not wear the way a plastic collar does
- Spout reach of 9-3/16" clears the far side of a standard 22-inch front-to-back sink
- Diamond Seal keeps water off the valve, which is what the lifetime warranty is really protecting
- Deck plate in the box, so a three-hole sink needs no extra part
What does not
- 1.8 gpm is higher than the 1.5 gpm most competitors now ship, which matters if your area caps flow rate
- Zinc body rather than brass — normal at this price, but this is not a forever faucet
- No independent lab publishes durability figures for this model, so we cannot tell you how the finish looks at year five
Skip it if
Skip it if your sink is a shallow bar sink: at 14-7/8" overall the arc will splash in a basin under about seven inches deep.
#ad Affiliate link · We publish no price; Amazon shows the current one
Raw specifications: Delta’s own page for the Delta Leland 9178-AR-DST.

Photograph shows the product category, not this specific unit. We do not republish manufacturer product photography.
3. Best if you want the taller arc
Moen Arbor 7594
Moen · Best for deep pots and hard-water kitchens
The pull-down to buy if you want the taller arc and a finish that hides water spots. Its 8-1/4" spout height is about half an inch more clearance than the Leland, which is the difference between washing a stock pot and fighting one. The tradeoff is reach: 7-7/8" against 9-3/16", so it works closer to the back of the bowl.
Published specifications
What works
- The 8-1/4" spout height is genuine pot clearance, not decorative arc
- Power Boost concentrates the stream for filling and rinsing without raising the rated flow
- Spot Resist Stainless is the single most useful finish choice in a hard-water house
- Reflex docking has been in Moen's line long enough that replacement wands are easy to find
What does not
- Reach is 7-7/8", over an inch shorter than the Leland — on a wide double bowl you will notice
- Moen publishes no independent noise or durability measurement, and neither do we
- The spot-resist coating is a finish, not armor; abrasive cleaners still dull it
Skip it if
Skip it if you have a wide double-bowl sink and want one faucet to reach both drains comfortably — buy reach instead of height.
#ad Affiliate link · We publish no price; Amazon shows the current one
Raw specifications: Moen’s own page for the Moen Arbor 7594.
When the mounting nut will not move
This is the single commonest failure point in the whole job, and it has a sequence. Work through it in order rather than escalating straight to force.
- More oil, more time. Penetrating oil works by capillary action and it is slow. Spray, wait, spray again. An hour of waiting beats an hour of straining.
- Check the direction. You are turning the nut, not the shank, and from underneath the geometry inverts. Counter-clockwise viewed from below is what loosens it. More people than will admit it have been tightening.
- Get the angle right. A basin wrench jaw only bites when the head is square to the nut. The RIDGID 1017's head locks at any angle up to 90 degrees precisely so you can set it rather than fight it.
- Heat, carefully, and only on metal. A hairdryer or a heat gun on low expands the nut slightly. Never an open flame near a plastic supply line or a cabinet.
- Cut it off. A nut splitter, a rotary tool with a cutting disc, or a hacksaw blade in a handle, depending on access. The old faucet is going in the bin, so destroying its hardware costs nothing. Protect the sink deck with tape and work slowly.
The other things that stick
The supply line nut at the valve can seize too, particularly on older chrome-plated brass. Hold the valve body with a second wrench — if you twist the valve, you can shear the stub inside the wall, and that is a genuine emergency rather than a setback. If the nut will not move and the valve is being strained, stop and get a plumber on it.
The faucet body can also bond to the deck, with silicone or with decades of mineral deposit. Once the nuts are off, run a utility knife around the base and twist the body gently rather than levering it, which bends a thin stainless deck. Patience here, again, costs nothing.
What to do with the hole count
With the old faucet out you can see exactly what you have: one, two, three or four holes at a standard 1-3/8 inches. A single-hole faucet covers a three-hole sink using the deck plate that most of them include, and both of the replacement faucets picked here ship with one. A widespread or bridge set cannot be fitted to a single-hole sink at all.
Faucet hole configurations covers which drilling accepts what, and now is also the moment to change your mind about a soap dispenser or an air switch, because the deck is clear and accessible. If the sink needs a new hole drilled in stone, that is a separate trade and a separate decision.
Then the new one goes in: how to install a kitchen faucet is the procedure, and what tools do you need to install a kitchen faucet is the list to have laid out before you start.
What to take away
- Spray the mounting nuts with penetrating oil as your first action, not your fifth.
- Test both shut-off valves before anything else. A valve that will not close changes the job.
- Empty the cabinet completely. Access is the job; everything else is straightforward.
- Counter-clockwise viewed from below loosens the mounting nut. The geometry inverts underneath.
- A seized nut gets oil, time, angle and heat before it gets cut — and cutting it is a legitimate answer.
- Hold the shut-off valve with a second wrench. Shearing a supply stub inside the wall is the one real risk here.
- Clean and dry the deck before the new faucet goes on, or it will weep at the base.
How we sourced this page
Every figure on this page came from one of the following. Where a manufacturer or an independent lab does not publish a number, we say so rather than estimate it.
Common questions
- How do you remove a kitchen faucet that is stuck?
- Penetrating oil and time first, then check you are turning the right way — counter-clockwise viewed from below. Set the basin wrench head square to the nut rather than fighting it at an angle. If it still will not move, gentle heat on a metal nut, and finally cut it off with a nut splitter or a rotary tool. The old faucet is scrap either way.
- Can you remove a kitchen faucet without a basin wrench?
- Only if the faucet uses a hand-tightened nut or a front-accessible bracket, which some modern designs do. Whatever is currently in your sink was almost certainly fitted with a conventional nut behind the bowl, and pliers in that space round the nut rather than turning it.
- Which way do you turn a faucet mounting nut?
- Counter-clockwise to loosen, viewed from below where you are working. The geometry feels inverted because you are looking up at the nut rather than down on it, and tightening by mistake is a common and frustrating few minutes.
- Do you have to turn the water off to remove a kitchen faucet?
- Yes — both angle stops under the sink, then open the faucet to drain the lines and relieve pressure. If the shut-off valves do not close properly, the house main is the fallback, but a valve that fails is itself a reason to get a plumber involved before going further.
- How do you clean the sink deck after removing a faucet?
- Scrape the old putty or silicone off with a plastic scraper and a utility knife held flat, then wash with warm soapy water and dry thoroughly. The new faucet's gasket needs a flat, clean, dry surface — skipping this is the usual reason a new faucet weeps around its base.
More in Guides
Organized by task, not by date, because a faucet install guide does not go stale and should not get buried under a blog feed. Every guide includes the honest point at which to call a plumber.
Read next

How to
Install a kitchen faucet
Ten steps, branched by hole configuration, with the tools and parts list up front and the when-to-stop line stated plainly.

Guide
Faucet installation tools
The six tools and three supplies a kitchen faucet swap actually needs, why a basin wrench is the one that decides the job, and what the faucet should bring with it.
Guide
Do you need a plumber?
When a faucet swap is genuinely a DIY afternoon, the five conditions that make it a trade call, and the tool that decides which.
Guide
Faucet hole configurations
What each drilling pattern accepts, the standard hole size, how deck plates work, and what adding a hole really involves.
Guide
Faucet supply line sizes
Which end of a supply line decides the size you buy, what every faucet in this registry publishes, and how to choose a length that is not too short.
Easiest faucet to install
Easiest to install
Four faucets chosen on the connections you actually have to make under the sink, plus the one tool none of them removes the need for.
Found something out of date, or a figure you can source better than we did? Tell us — corrections get read first. Our methodology explains how picks are made, and contact is one click away.